Setup for all episodes.
Text Editor
A text editor is the piece of software you use to view and write code. If you have a preferred text editor, please use it. Suggestions for text editors are, Notepad++ (Windows), TextEdit (macOS), Gedit (GNU/Linux), GNU Nano, Vim. Alternatively, there are IDE’s (integrated developer environments) that have more features specifically for coding such as VS Code; there are also IDEs specific to languages will be listed in the appropriate section(s) below.
Open a Terminal
For this lesson, first you need to open a terminal:
- On Windows: run “Git Bash”, to install git bash go here https://gitforwindows.org/ click download and select ‘Git-X.XX.X-64-bit.exe’ from the assets list.
- On Mac OS X: accessed by opening the “Terminal” application, which can be found in the “Utilities” folder which is in your “Applications” folder.
- On Linux: this will depend on the Linux distribution you are running, but you should be able to find a “Terminal” application in your desktop’s application menu.
Git Setup
Windows
We’ll be using Git Bash for both git and a shell to run it in. If you’ve already installed Git Bash then go to the next section. Otherwise, go to git for windows and click Download, then install it. Most of the options can be left on default, but be sure you check these:
- Choosing the default editor used by Git: Make sure Nano is selected from the drop-down. If you’re comfortable with other editors, feel free to change it, but we recommend Nano - we use it as it’s present on Windows, Mac and Linux. If you change it, you might not quite match what we’re doing on-screen.
- Adjusting your PATH environment: Make sure Git from the command line and also from 3rd-party software is selected.
- Choosing HTTPS transport backend: Make sure Use the native Windows Secure Channel Library is selected.
- Configuring the terminal emulator to use with Git Bash: Make sure Use Windows’ default console window is selected.
Mac OS
To use Git you must install the Apple Command Line Tools. You can obtain these from Apple (requires your Apple ID)
- Select Command Line Tools for Xcode 12 and click the link to download the dmg archive.
- If prompted, choose to allow downloads from developer.apple.com
- Open the downloaded dmg archive from the Downloads folder
- Double-click the Command Line Tools.pkg icon to install
Download Data for Shell Lesson
Type the following into the prompt that appears (pressing enter/return after each line):
$ cd
$ git clone https://github.com/Southampton-RSG-Training/shell-novice.git
Alternatively, if you have SSH authentication with GitHub enabled (if you don’t know what this means don’t worry, it is covered in the Git SWC course if you want to know more!) you can use the following:
$ cd
$ git clone git@github.com:Southampton-RSG-Training/shell-novice.git
This should download all the content for the lesson to a new directory. Please let the instructors know if you run into any problems.
GitHub
Later on in the session, we’ll be demonstrating how to share work with collaborators using GitHub. You’ll need to create an account there. As your GitHub username will appear in the URLs of your projects there, it’s best to use a short, clear version of your name if you can.
In addition, we’ll need to set up SSH access to GitHub from your computer. This is how GitHub checks your identity when you try to access it - and is more secure than a password. To set up SSH access, we generate a pair of keys - one public, one private. We want to add the public key to GitHub, whilst the private one stays on our computer.
There are full guides in the GitHub documentation for how to Make an SSH Key and Add an SSH key. However today we have simplified it like so:
First we need to create a variable to store your GitHub email. Copy this command, substituting the email you signed up to GitHub with for your_github_email@example.com:
$ my_gh_email=your_github_email@example.com
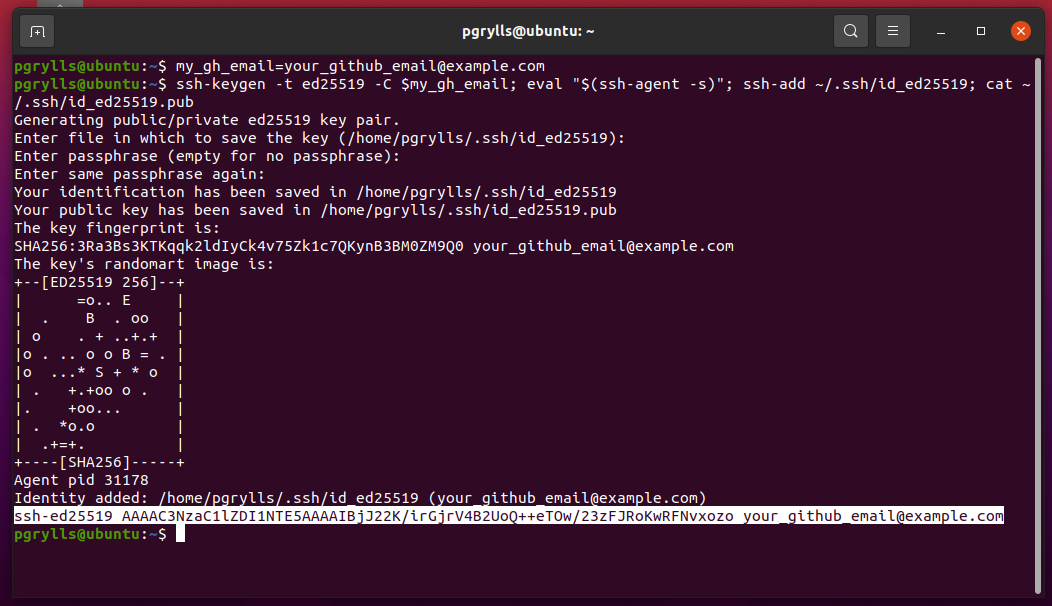
Then we can run the following command to generate a key-pair and display the public half:
$ ssh-keygen -t ed25519 -C $my_gh_email; eval "$(ssh-agent -s)"; ssh-add ~/.ssh/id_ed25519; cat ~/.ssh/id_ed25519.pub
You will need to press enter a few times to select default options, and set the passphrase to empty.
Copy the last line of output that starts with ssh-ed25519 and ends with your email (it may have gone over multiple lines if your terminal isn’t wide enough).
Finally, go to your Settings -> SSH keys page and add a new SSH key (you’ll need to be logged into GitHub with the account you have created). Give the key a memorable name (e.g. the name of the computer you are working on) and paste the key from your clipboard into the box labelled key. Then, click Add SSH key and you’re done!
Download Data for Git Lesson
Now we are ready to download the code that we need for this lesson, using Git on the command line. Open a terminal on your machine, and enter:
$ cd
$ git clone https://github.com/Southampton-RSG-Training/git-novice
cd will move to your home directory, and git clone will download a copy of the materials.
Python Setup
IDEs: PyCharm, Spyder, VS Code
We use Python 3*. The “Anaconda3” package provides everything Python-related you will need for the workshop. To install Anaconda, follow the instructions below.
Some old research projects may be in Python 2 but Python 2 has been retired and new projects should be in Python 3.
Windows
Download the latest Anaconda Windows installer. Double-click the installer and follow the instructions. When asked “Add Anaconda to my PATH environment variable”, answer “yes”. After it’s finished, close and reopen any open terminals to reload the updated PATH and allow the installed Python to be found.
Mac OS X
Download the latest Anaconda Mac OS X installer. Double-click the .pkg file and follow the instructions.
Linux
Download the latest Anaconda Linux Installer. Install via the terminal like this (you will need to change the version number to the latest version):
$ bash Anaconda3-2021.11-Linux-x86_64.sh
Answer ‘yes’ to allow the installer to initialize Anaconda3 in your .bashrc.
Download Data for Python Lesson
Now we are ready to download the code that we need for this lesson. Open a terminal on your machine, and enter:
$ cd
$ git clone https://github.com/Southampton-RSG-Training/python-novice
cd will move to your home directory, and git clone will download a copy of the materials.